Thursday, July 29, 2010

Chocolate Mousse Dream Cake . . . and One Boy's Birthday

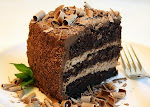
He didn't request a raucous party with two dozen friends. Nor did he claim that the day would be incomplete without a confetti-cannon wielding clown. No, aside from a few special gifts, and a family dinner at a Thai restaurant, my son Nathan had just one additional requirement in order to make it a perfect 14th birthday. That, my friends, was the request for this dessert--a three-layer, mousse-filled, chocolate covered dream of a layer cake.


Last summer, upon turning 13, Nathan requested a towering ice cream cake; I made that, and he loved it. The year before, he wanted me to make a cake that looked like a furry monkey's face, and I complied; it was pretty cute, and he adored it. This year, though, the cake he asked for seemed to reflect his maturing taste, and he chose carefully. As his mom, it was a little poignant for me to note this because it's just another indication that he's growing up. He is, after all, my youngest. It's also, though, a bit thrilling to watch his progress. (I often say to my sons, "I know you're not a baby, but you'll always be my baby." Then they smile and roll their eyes.)


Happily, Nathan is still mostly a kid. He pilots his skateboard like a jockey on a thoroughbred, draws psychedelic graffiti in a sketchbook whenever the inspiration hits, and every now and then he thrusts his arm toward me, fist tightly closed, and boyishly commands, "Pound it, Mom!"  Yep. He's Nathan, he's 14, and he's a great kid.


About this recipe . . .

This multi-step formula hails from a "Cooking with Paula Deen" special-issue magazine that I received as a gift a couple of years ago, called Paula Deen's Chocolate Celebration. It really is a fabulous concoction--from the soft moist cake, to the fluffy mousse filling, to the ganache-like icing. The crumbly coating you see on the outside is made from a combo of  milk- and dark chocolate that's been grated (use your favorite premium chocolate for this part--don't skimp) and curled.


Though not at all difficult to make, this dessert does demand some planning, so be sure to organize your day accordingly. An impressive and extremely delicious cake for a special occasion, this one is well worth the labor. I adhered pretty closely to the original recipe(s), but did some rewording here and there. Oh, and the original recipe calls for splitting the layers, so you have six thin layers in all, but I didn't think that was necessary, and just used three unsplit layers for mine.


Chocolate Mousse Cake

(For a printable version of this recipe, click here!)

Because the fluffy mousse needs to chill for about four hours before it can be used, feel free to prepare it first, before you bake the cake.

To make the cake:

Preheat the oven to 350 degrees. Grease three 9" round cake pans. Line the bottom of each pan with parchment cut to fit. Grease the parchment, then flour the bottom and sides of each pan, tapping out the excess flour.

2 cups All-Purpose flour (I used unbleached)
2 cups granulated sugar
3/4 cup cocoa powder (I used natural cocoa)
1 and 1/2 tsp. baking powder
1 and 1/2 tsp. baking soda
3/4 tsp. salt
1 cup milk (I used 2 percent)
1 cup strong brewed coffee
3/4 cup vegetable oil (I used canola)
2 eggs, large

In the large bowl of your mixer, combine the flour, sugar, cocoa, baking powder, baking soda, and salt. All at once, add in the milk, coffee, oil, and eggs. Beat this mixture at medium speed just until smooth. The batter will be very thin. Pour it evenly into the three prepared pans. Bake the cakes for about 20 to 25 minutes, until a toothpick inserted in the center comes out clean and the cake springs back when very lightly touched. Cool the cakes in their pans, on racks, for 10 to 15 minutes. Carefully invert the cakes to remove them from their pans, then invert them again so they can finish cooling on racks right side up.

To make the mousse:

Makes approximately 4 and 1/2 cups (which is a lot--you'll have some leftover!)

1 envelope unflavored gelatin
3 Tbsp. cold water
1/4 cup boiling water
1 cup granulated sugar
1/2 cup unsweetened cocoa powder (use natural, or Dutch process, or a combo; I did the latter)
3 cups heavy cream

In a little bowl, soften the gelatin in the cold water, letting it stand undisturbed for two minutes. Add in the boiling water, and stir it slowly until the gelatin completely dissolves and no lumps are apparent. Set this aside.

In another small bowl, combine the sugar and the cocoa well, with a fork or whisk.
In a medium size mixer bowl, on medium speed, beat the heavy cream until it's quite foamy. Into this, gradually pour the sugar mixture and beat until it holds stiff peaks.

Then, stir in the dissolved gelatin by hand, folding it in evenly (if you don't distribute the gelatin evenly through careful stirring and folding, the mousse will be thicker and firmer in some spots, and too soft in others). Cover the bowl with plastic wrap and chill it in the fridge for at least four hours.

To make the chocolate icing:

Makes approximately 3 cups (I had about 1/2 a cup of this leftover)


1 cup granulated sugar
1 cup heavy cream
5 (1 oz. each) squares unsweetened chocolate
1/2 cup and 2 Tbsp. unsalted butter (doesn't have to be softened)
1 cup confectioner's sugar

Combine the granulated sugar and the cream in a medium size heavy-bottomed saucepan. Carefully bring it to a boil over medium-high heat, then keep it on a low simmer for 6 minutes. Stir it often and watch it closely so it doesn't come to a full boil again. Taking the pan off the heat, add in the butter and chocolate, stirring until it's all completely melted and the mixture is perfectly smooth; let it cool in the pan for 10 minutes. Using a whisk, incorporate all of the confectioner's sugar. Let the icing cool until it reaches a spreadable consistency.

To prepare the grated chocolate, and chocolate curls, for the outside of the cake:

You'll want to have at least 3/4 of a cup of grated chocolate available to cover the cake. If you can find chocolate that comes in big chunks, that is the easiest form in which to hold it for grating. I use Callebaut, a very good brand, which can be purchased in pieces by the pound. I use a combo of dark bittersweet chocolate and milk chocolate, which works well because the milk chocolate is softer and sweeter, while the dark chocolate is a bit drier and moderates the sweetness. Have the grated chocolate in a bowl close at hand before you are ready to coat the sides of the cake. Place a baking sheet with shallow sides on your work surface right near the bowl.

Using a vegetable peeler, peel some larger curls from the chocolate chunks and set them aside on a plate (or put them in the fridge if they're quite soft; they're always extremely fragile and often break when touched). It seems easier to make nice curls from milk chocolate since it tends to be softer and more flexible.


To assemble the cake:

Using a cardboard cake-round (if at all possible, or something that can function in the same capacity), place the first cake layer on it. Using an offset spatula, ice the top of the layer thickly with the chilled mouse. Place the second layer atop this, and cover it as well with a thick layer of the mousse. Place the third and final cake layer on top. If at this point the mousse seems very soft, put the whole cake into the fridge for about half an hour, or into the freezer for 15 minutes.

Using an offset spatula, spread the chocolate icing on the top and sides of the cake. It should be spread on fairly evenly, but it's not critical that you try to make it incredibly smooth, since it will be covered with grated chocolate, and you can gently pat down any uneven areas. While the icing is still quite soft, pick up the iced cake from beneath the cake-board (slide a thin metal spatula beneath it to help you lift it onto your hand). Holding the cake carefully on your non-dominant hand, sprinkle the sides of the cake with the grated chocolate, patting it on gently. Do this while holding the cake above the baking sheet so it can catch the falling chocolate crumbs and you can scoop them up again. Turn the cake as needed until the whole thing is completely covered. Carefully slide/sprinkle the chocolate curls onto the top of the cake. Place your cake on its serving dish. Keep the cake in the refrigerator until shortly before you'll cut it. Because the filling and the icing are rich with dairy products, you should store any leftover cake in the fridge as well.


(If you'd like to comment on this post, or to read any existing comments, please click on the purple COMMENTS below!)

Monday, July 26, 2010

Have a Happy Heat Wave . . . with Mango Strawberry Popsicles!


Popsicles sure have come a long way since I was a kid. (And I'm using the term "popsicle" in its generic sense here, just so we're clear.) Back then, the choices were awfully limited. We had orange, grape, and red (what flavor was that red one attempting to emulate anyway--cherry? raspberry? strawberry? . . . no way to  tell). Yeah, they were sweet, colored, ice hunks on a stick. 

At the time, I thought they were darn good. I had no standards, no point of comparison. I wasn't the kind of kid to turn down any cold treat on a hot summer day. I was ignorant, thus blissful. A popsicle was a popsicle was a popsicle. After all, in the 1960's there was nothing available that even approached the vast array of interesting stock one finds these days in the freezer case of any local market. So what did I know?


Of course, these days, we're virtually adrift in frozen novelties. (And, speaking of which, don't you just love that phrase?  It's so whimsically vague. It implies all sorts of magical possibilities, cast in ice. I wonder what hard-drinkin', cig-smokin' salesman came up with that. Whoever he was, I'll bet he ate a lot of 'em.) The choices can be dizzying. I say, if you can't decide, head for the fruitiest bars you can find. Or, better yet, make your own.


I can't honestly recall the first time I tasted a frozen bar that seemed as if it was comprised more from fruit than it was from sugar water, but it must have been a revelation to me. Popsicles laden with real fruit are in a class by themselves. They cost more, for one thing. They're usually far, far prettier than their more insipid counterparts, and they appeal to kids and adults alike. I mean, who could turn their nose up at a fresh, brightly constructed popsicle that's been packed with fruit? Well, no one, that's who.


This super simple recipe satisfies the urge for an icy treat that's low in calories and only as sweet as you want to make it. I built it quickly using strawberries, a couple of perfectly ripe mangoes, a little Greek style yogurt, and clover honey. That's it--so easy! Haul out your popsicle mold (I bought mine here), or just use plastic cups, get yourself some wooden craft sticks, and go to town! 


Homemade Mango Strawberry Popsicles 

(For a printable version of this recipe, click here!)

 Have your popsicle molds, and the wooden sticks, ready and standing by. This recipe makes up to about four cups worth of liquid to pour into them. My popsicle mold makes 10 standard size pops.

2 medium size mangoes, completely ripe but not too soft; peeled, cut off the pit, and cut into medium-size chunks (about 2 cups of pieces)
1 cup clean strawberry pieces, halved
3/4 cup clean strawberry pieces, chopped into small pieces
honey, to taste (I used 4 Tbsp. of typical clover honey)
1/4 cup Greek style yogurt (I used the higher fat type; use low, though, if you prefer)

In the large bowl of your food processor, puree all of the mango and the 1 cup of halved strawberry pieces until quite smooth and free of large lumps.


Add in the yogurt, and pulse for a moment just to combine. Add in the honey to taste; add as much as you prefer to get the desired sweetness. 


Pour the mixture into the molds, scattering in pieces of the small-chopped strawberries as you pour so they'll be distributed throughout each bar. 


Put the sticks in (the wooden sticks for my mold have to be soaked in water for an hour prior to being stuck into the popsicle liquid; my mold has a loose metal lid and the sticks go through tight slots, as shown), and freeze for at least one hour, until completely solid.


To get the frozen pops out of my mold, I run it under warm water for several seconds, remove the metal top, and then firmly pull up on the sticks. It works pretty well.


And voila! Enjoy!

(If you'd like to comment on this post, or to read any existing comments, just click on the purple COMMENTS below!)

Monday, July 19, 2010

Espresso Chocolate-Chip Pound Cake with Ganache Glaze . . .


I've been wallowing lately, but not in anything bad. Not in mud, self pity, or anything unpleasant like that. Just in some really luscious cookbooks. Have you ever seen this one? It's not new, or even newish, but that doesn't diminish its appeal one bit.


Baking by Flavor, written by Lisa Yockelson, could keep you busy for a long time. Tossed onto a deserted tropical island--one with a fully equipped kitchen--you'd be content to work from this book right up until you were rescued a few months later. (Oh, and when you arrive on the island, I highly recommend you turn first to the coconut based recipes. Nothing like using local produce, right?)

The book is organized by primary flavors, rather than by particular food type. Personally,  I find this approach enormously practical. This is almost always how I first embark upon  the search for a good recipe. My quest begins with the desire to feature a particular flavor, and not necessarily the yen to produce a cake versus a pie versus a cookie versus a you-name-it. Is it like that for you too?


About this cake . . .
This velvety pound cake is like a well orchestrated composition. It's flavors are deep, rich, and expressive.  My husband, coffee maniac that he is, is quite enamored. My younger son--the chocolate fan extraordinaire--also gave it high marks, and augmented his slice with a scoop of homemade chocolate-almond  ice cream (that boy knows how to enjoy a dessert!).


While baking this last week, I stuck pretty closely to the original formula with a few very small alterations. The most obvious adjustment entailed cloaking the baked cake in a creamy ganache instead of brushing it with a coffee and liqueur syrup.  (The ganache recipe isn't from the book. It's something for which you hardly need a recipe, and it's a pretty standard formula, anywhere you look.)


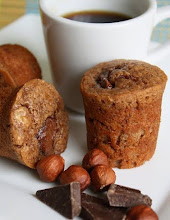
This cake can accommodate a massive crowd and, rich as it is, thinner slices are usually the way to go. Don't forget to serve it along with a big pot of java . . . but you might want to make that decaf! (And don't panic, all those little coffee beans in the photos are just there for effect; I'm not suggesting you sprinkle them on the cake!)


Espresso Chocolate Chip Pound Cake . . . with Ganache Glaze

(For a printable version of this recipe, click here!)

Preheat oven to 325 degrees. Grease a tube pan, or a 9" to 10" springform pan fitted with the tube insert, with vegetable shortening. Line the bottom of the pan with parchment paper cut to fit. Grease the paper. Dust the inside of the pan with flour and tap out the excess.

2 tsp. instant espresso powder
2 tsp. vanilla extract
1/4 tsp. hot water
2 and 3/4 cups unsifted All-Purpose flour, unbleached
1/4 cup unsifted cake flour
1/3 cup plus 1 Tbsp. Dutch processed cocoa
1/8 tsp. baking powder
1/8 tsp. baking soda
1 tsp. salt
2 cups dark chocolate chips, coarsely chopped
1/2 lb. unsalted butter, softened (2 sticks)
2 cups granulated sugar
3/4 cup firmly packed light brown sugar, with all lumps broken up
5 eggs, large
1 cup sour cream, thick style
2 Tbsp. heavy cream

For the ganache: 
1 and 1/2 cups heavy cream
1 and 1/2 cups chopped dark chocolate

To make the cake:
Stir together the espresso powder, vanilla extract, and hot water in a very small bowl.

Onto a large sheet of parchment or wax paper, sift together the flour, cake flour, cocoa, baking powder, baking soda, and salt. In a medium size bowl, toss the chocolate pieces with about 1 Tbsp. of this flour mixture. Set both aside.

In the large bowl of your mixer, cream the butter on medium speed for 2 minutes. Scrape the bowl.


Pour in the granulated sugar in 3 additions, mixing for about 1 minute after each addition. Scrape the bowl frequently to ensure even mixing. Add in all of the brown sugar and beat for 1 more minute. Scrape again.

One at a time, add in the eggs, beating for 45 seconds after each one. Scrape!


Blend in the espresso mixture.

On low speed, add in the sifted ingredients alternately with the sour cream (3 additions of flour and 2 additions of the sour cream). Scrape after each addition.


Blend in the heavy cream.


Remove the bowl from the mixer and fold in the chocolate pieces well with a spatula.


Spoon the batter into the prepared pan and smooth out the top.
 

Bake the cake on the middle rack of your oven for about 70 minutes or more, until a toothpick inserted near the center comes out clean and the cake starts to pull away slightly from the sides of the pan. (I put my pan on top of a baking sheet to help prevent the possibility of burning the bottom of the cake. If you are concerned about this too, do the same. I also checked the cake about half an hour into baking, and covered the top lightly with foil to prevent over-browning. My oven is temperamental this way.)

Cool the cake in the pan on a rack for 10 to 15 minutes. (If you used a springform pan, remove the sides of the pan after only 5 minutes. Run a thin knife around the edge if there seems to be any resistance at all.)


Invert the cake onto another cooling rack, remove the parchment paper and invert the cake again so it's right side up. Allow the cake to completely cool on the rack.


To make the ganache:

Place the chopped chocolate in a medium size bowl. In a heavy sauce pan, warm the heavy cream over a low flame. Do not let it boil. Pour all of the warm cream over the chocolate and let it sit undisturbed for a few minutes, then gently stir until all the chocolate is melted, completely blended in, and the ganache is smooth.

 
Wait until the ganache is closer to room temperature before spooning or pouring it over the cooled cake. (Be sure to place the cake on a rack over a sheet pan, to catch the drips, before pouring or spooning on the ganache! You can save and refrigerate any extra ganache to use for something else.)


(If you'd like to comment on this post, or to read any existing comments, please click on the purple COMMENTS below!)

Monday, July 12, 2010

Retro Desserts, Part V: Cherries Jubilee . . . with Pomegranate Juice & Grand Marnier


Last year, I did a little series of posts focusing on retro desserts. My desire was to zero in on a few of the more definitive desserts that Americans typically associate with the mid-20th century. Sweet and enduring dishes that, despite their lack of modern fashion sense, have managed to avoid full admittance into the dreaded Halls of Obsolescence. How did they escape that fate? By embedding themselves deeply into the treat-loving American psyche, that's how. We don't give up our heroes without a fight, and we obviously feel the same way about our best desserts.


In 2009, we talked here about banana cream pie beneath a snowy drift of whipped cream, triple-layer devil's food cake cloaked in chocolate buttercream, dark chocolate bread pudding, and well-stuffed faux Oreo cookies. It's been quite a while since the last retro post, so I figured it was time to add to the list. No time like the present!


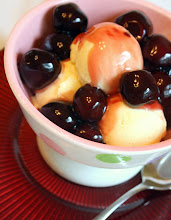
Now, one could argue that cherries jubilee, though having enjoyed a decade or so of wild popularity in the U.S. about fifty years ago, doesn't really fit into the retro American category very neatly. I don't know about you, but my mom sure never made this stuff at home when I was a kid. Flaming food? If food ever caught on fire in our kitchen it didn't happen by design. That was too much pseudo-sophistication for a traditional Midwestern household in the 1960's.


But that's okay. I'm admittedly stretching my own guidelines a bit here. Though it's true I never ate this back then, it seems like every major cookbook I ever peeked into contained a recipe for it. Cherries jubilee, along with its sidekick baked Alaska and its exotic cousin crepes Suzette, popped up constantly and, if not necessarily on middle-class dinner tables, then in TV shows, in movies, in magazines, and on fancy restaurant menus. Somebody out there was eating it, and with good reason.


Of course, cherries jubilee is not at all American in origin. We have the legendary French chef and restaurateur Auguste Escoffier to thank for this beautiful, elegant, and relatively simple dish. He whipped it up in honor of Queen Victoria's "golden" or "diamond" jubilee celebration (exactly which event it was seems to be in question). Whether or not he ever served it over vanilla ice cream is sketchy at best, but that's the form in which it entered our culinary vernacular.


This particular version, which I've taken the liberty of calling my own, is . . . well . . . jubilant. Usually made with cherry brandy, aka kirsch (kirschwasser, literally translated as cherry water), or sometimes with the almond liqueur Amaretto, I instead used Grand Marnier, the bitter-orange based liqueur; it's an interesting alternative to kirschwasser, which doesn't seem to be easily accessible/affordable, in my neck of the woods.


Frequently augmented with almond extract, I left that out of my jubilee recipe entirely. Usually including cherry juice or a cherry juice blend, I chose to use POM Wonderful brand pomegranate juice instead and that worked really well. (Thanks very much to the POM Wonderful company for kindly sending me a free case of their superior juice! I love it!) Pomegranate juice looks and even tastes similar to cherry juice, so it was a natural choice.


Use the nicest, sweetest, ripe black cherries you can find in your jubilee--fresh vs. frozen if at all possible. If you use bad cherries in a recipe that features them, then all will be for naught, so be sure to taste those babies first!


My jubilee did not "flame" in the classic fashion, sadly. Maybe because I didn't add in the full recommended amount of brandy. I got just the tiniest flame out of mine, then it fizzled. Pfffftt. Like that. It seems that the flame concept is mostly for show and not much else, or so I am telling myself, but no matter. Flame or no flame, cherries jubilee is still wonderful.


Oh, and before I forget, this was made using the finest homemade vanilla ice cream recipe I've ever run across. Not unexpectedly, it's from David Lebovitz's book The Perfect Scoop. If it can be improved upon, I just don't know how. The texture is right on target in every way, and the flavor is exceptional.


I've made some sorry dud ice creams in my day, but this one was a huge hit here. My 17-year old son, Charlie, gave me a solid fist-pound directly upon tasting it. He said something like, "Mom, you may have finally cracked the ice cream code." I know it must be a blazing success if that kid will actually eat it with gusto.

The ice cream recipe below makes one scant quart and no more; it's very rich and ultra creamy. If you're serving a crowd, plan to make more than one batch!


Cherries Jubilee . . . with Pomegranate Juice & Grand Marnier

(For a printable version of this recipe, click here!)

For the cherry sauce:

1 cup pomegranate juice (I recommend POM Wonderful brand)
2 Tbsp. cornstarch
4 Tbsp. granulated sugar
1 pinch ground cinnamon
About 4 cups of whole, sweet, fresh black cherries--pitted
2 Tbsp. to 4 Tbsp. Grand Marnier liqueur (Use up to 1/3 cup if you love this stuff; I used the lesser amount  because I didn't want to overwhelm the flavor of the cherries.)

In a medium sauce pan, stir together the sugar, cornstarch, and cinnamon. Add in the pomegranate juice and, on medium heat, stirring constantly, bring the mixture just to a boil. Immedately lower the heat. Simmer the sauce for a couple of minutes, still stirring constantly, just until it thickens enough to easily coat a wooden spoon. You want it to be about as thick as gravy, and no thicker; it needs to remain pourable.


Remove the pan from the heat and gently stir in all the cherries, to coat them. Set aside.


In another smaller pan, carefully warm the liqueur. It doesn't need to be hot--just warm. Now, pour the liqueur over the cherry mixture and immediately light it with a long match. If you time this well, and have your dishes of ice cream scooped and ready, the  cherry sauce can be spooned over the ice cream while it's still flaming, for a classic presentation. (I have yet to achieve this, so don't be discouraged!)

For the vanilla ice cream:

1 cup whole milk
3/4 cup granulated sugar
2 cups heavy cream
pinch of salt
1 vanilla bean, split in half lengthwise
yolks from 6 large eggs
3/4 tsp. vanilla extract

In a medium saucepan, warm the milk, sugar, 1 cup of the cream, and the salt. Scrape the seeds from the vanilla bean and add them, along with the hull of the bean, into the warm mixture. Cover the pan and remove it from the heat; let it steep like that for 30 minutes.

Pour the remaining 1 cup of cream into a large bowl; set a fine mesh strainer on top of the bowl.

In a medium size bowl, whisk together the yolks. Slowly pour the warm mixture into the yolks, whisking constantly, then pour this all back into the medium size saucepan. Over medium heat, constantly stirring and scraping the bottom of the pan, heat the mixture until it thickens enough to coat a spatula. Pour this custard mixture through the strainer over the bowl of cream; stir it into the cream thoroughly. Put the vanilla bean into the custard and add in the vanilla extract. Cool it in its bowl, set over an ice bath (a larger bowl filled with ice).

Once cool, chill it completely in the refrigerator. When you're ready to churn the ice cream, remove the vanilla bean. Churn and then freeze the ice cream according to the manufacturer's instructions for your ice cream maker.

* * * *
(Hey--do you love POM Wonderful? Here are a couple of other great food bloggers' recent posts showing how they used their free POM juice! These are two of my favorite blogs . . . )
Day Dreamer Desserts
More Than a Mountful


(If you'd like to comment on this post, or to read any existing comments, please click on the purple COMMENTS below!)