Monday, May 30, 2011

Chocolate Cocoa Nib Cookies . . . (Cocoa Nibs: A Startling and Delightful Flavor Conundrum!)


Maybe this is too personal, but I just have to ask . . . Are you into cocoa (aka cacao) nibs? Because I am. And I love 'em. What are they, exactly? They're fragments of shelled, winnowed, roasted cacao (pronounced kuh-KOW) beans, the precious beans that bring us chocolate. Okay, big deal, you say. So what makes them remarkable? Well, I'll tell you. Each tiny nib is its own special-delivery parcel of profound flavor. Bite down, and it's like a little grenade going off in your mouth--intensely bright and dark at the same time. Ka-boom!


The effect a modest sprinkling of nibs can have on an otherwise mundane recipe is startling. Stir a handful into cookie dough. Sprinkle them judiciously over waves of whipped-cream on a mocha cream pie. Swirl them into homemade ice cream before you put it into the freezer to ripen. Add them into that buttery almond brittle recipe you're so famous for. Do you see where I'm going with this? Limitless possibilities, fellow bakers!


They taste kind of like coffee, but not as bitter, with a complex and curious finish that evokes tropical fruit. Sometimes I can even picture a banana in there! No kidding. And, of course, they also taste like dark chocolate, but not overtly so. You'd think they'd be chocolate-chocolate-chocolate all the way through, but that's not always the case. They're a mysterious and delightful conundrum.


And as for texture? Nibs, while hard and crunchy, are apt to shatter between your teeth more readily than something like a roasted coffee bean or a toasted almond. If you're unfamiliar with them and a little gun shy, try this: Put a few nibs on your tongue--not too many--close your eyes, and concentrate. Pay attention when you bite into them. If the grenade analogy is too scary for you, think of it as a flavor-parade marching through your mouth. You can't ignore a parade, can you? Definitely not. Cocoa nibs are like that. Once they're in food, they won't be ignored.


Though they're scarce in regular markets, you can often find them in health/gourmet food stores, where they're sometimes sold in bulk and are not necessarily too pricey. Maybe you, too, should add them to your baking arsenal?

About this recipe . . . 

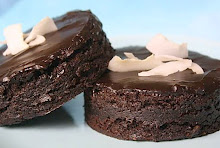
Adapted from the luscious new cookbook, Milk & Cookies, by pastry chef Tina Casaceli of New York city's Milk & Cookies Bakery, these treats are easy to toss together and will more than satisfy your cocoa craving. I customized the book's "base chocolate dough" recipe by adding in a half cup of nibs, along with dark chocolate chips and semisweet chunks. I also  increased the amount of salt, and used coarse kosher; the very subtle saltiness is a critical component of this cookie's character. And, as usual, I fiddled with the recipe's directions, reflecting exactly what I did.


I'd initially hoped for cookies that would be thicker and not quite so spread out, but their thin, chewy/crispy quality was actually rather appealing. (But the next time I make them, I think I might add in a few more tablespoons of flour and see if that helps reduce the spreading.) Even after a couple of days, the baked cookies didn't harden completely but remained chewy-crispy. Tuck one of these babies into a petite scoop of vanilla ice cream, and it makes a mighty satisfying dessert.

Chocolate Cocoa-Nib Cookies . . . with Chocolate Chips

(For a printable version of this recipe, click here!)

Preheat oven to 350. Line cookie sheets with parchment paper.

2 and 3/4 cups all-purpose flour
1/4 cup Dutch processed cocoa powder (I used Penzey's brand. Really good.)
1 tsp. baking soda
3/4 tsp. salt (I used coarse kosher salt.)
1/2 cup cocoa nibs
1 cup unsalted butter, room temperature
3/4 cup granulated sugar
3/4 cup light brown sugar, packed
2 large eggs, room temperature
1 Tbsp. vanilla extract
1 and 1/2 cups dark chocolate chips (I used Ghirardelli brand.)
1 cup semisweet chocolate chips (Actually, I used Nestle semisweet chunks; they're about twice the size of regular chips.)


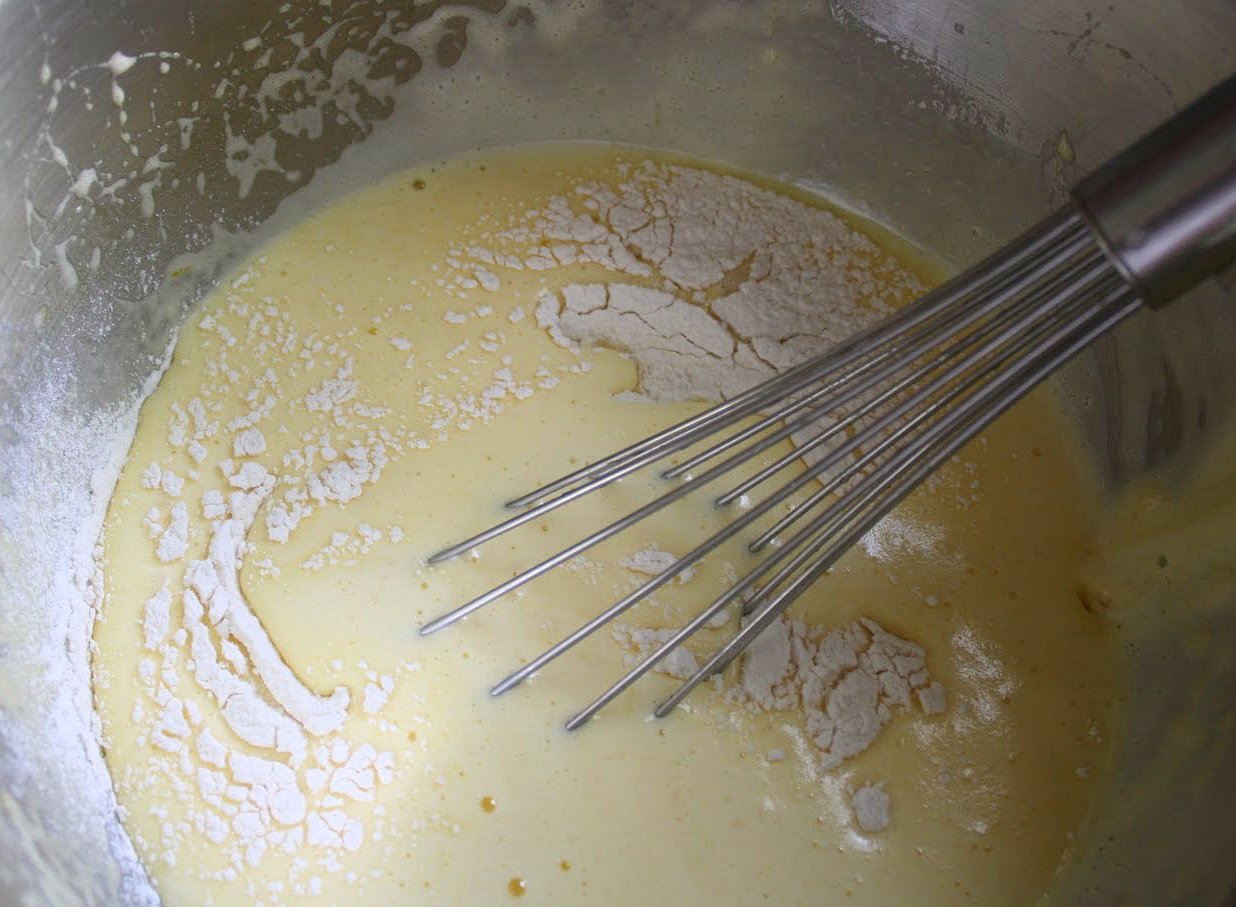
In a medium size bowl, gently whisk together the flour, baking soda, salt, cocoa powder, and cocoa nibs. Set aside.

In the large bowl of your mixer, using the paddle attachment, beat the butter for about three minutes or just until light and creamy. Still on medium speed, gradually pour in the white and brown sugars; keep beating until the mixture again looks light and creamy.

In a small bowl, break up the egg yolks, and lightly mix the eggs together with the vanilla. Pour this into the mixer bowl in two parts, beating to incorporate the liquid. Scrape the sides and bottom of the bowl after each addition.

On low speed, slowly add in the flour mixture, and beat just to combine. Take the bowl off the mixer and briefly stir by hand, using a spatula or wooden spoon. Add in all of the chocolate chips, just to evenly combine.

Chill the dough for at least an hour if it's extremely soft.

Use a small scoop or tablespoon to portion the dough onto the parchment, and leave plenty of room between each cookie (a couple of inches) since they spread quite a bit. Bake the cookies for about 12 minutes. They are done when they seem slightly browned/dry around the edges but still slightly soft in the middle. Let them cool for a few minutes on the cookie sheet before removing them to a cooling rack.

The cookie dough can be successfully frozen for about a month, or kept in the fridge for about a week.


(If you'd like to comment on this post, or to read any existing comments, please click on the purple COMMENTS below.)

Wednesday, May 25, 2011

Sharing a Sugar Swan . . .


Sometimes we try to do extraordinary or unusual things in my Pastry II class. Sometimes we succeed. Other times, not so much. Yesterday was one of the good days. We made these delicate swans and I just wanted to share mine with you guys.


The swan's body is made from blown sugar; the wings, feathers, flowers, and leaves from pulled sugar; and the base from poured sugar. Well, not sugar exactly, but a sugar substitute that pastry chefs use for this sort of thing called isomalt, which is derived from sugar alcohol. It's edible, of course, but not particularly intended for consumption.

The swan is no more than 7" tall and perhaps 6" long from front to back, and sits on a base of about 8" in diameter. Here's how it was made, in a nutshell: Its body is formed from a golf-ball sized glob of hot isomalt that you, first, mold with your hands into sort of a light-bulb shape (and, believe me, you're wearing plastic gloves--maybe even two pairs--the entire time you're working on this). Then, you attach the narrower end of that to the tube end of a small, primitive-looking, rubber hand pump, not unlike the pump used on a blood pressure cuff. You gently pump air into the sugar glob, which you're cradling in one hand, and, if you're very lucky, it expands cooperatively to about the size of a large lemon. Then, you pinch a bit of the hot sugar with your fingertips, from the non-tube end of the swan, and pull it upwards, curling it over to form the neck and head. At this point, you let the whole thing cool. Then you heat the tail end so you can remove the air tube (when that's done, you say a prayer of thanks that the whole thing hasn't shattered yet).

The wings are formed from small separate globs of hot sugar. To do this, you grab a bit of hot sugar, hold it tightly between thumb and forefinger, and then pull it out into the shape of a thin wing, and immediately use a pair of scissors to cut the feathering onto one side. The tail feathers were formed similarly, but without any scissor cuts. You heat just an edge of the wing and quickly attach it to the body.


The eyes were made by taking a very small, straight strand of colored sugar, letting it completely cool so it was like a tiny stick, and then reheating just the very end of it so it would melt into a drop. Then that melted tip was dabbed onto the swan's head on each side. The beak was made by pinching off bits of the same color sugar and pulling them into the appropriate shape, then gluing them on by quickly heating them on one edge.


 The little flowers were made by pulling a ribbon of sugar and then quickly rolling and tucking it up, very simply. The leaves were formed much the same way the wings were. And the dark blue base that the swan is sitting on was made from extremely hot isomalt that was poured into a shallow, round, rubber mold and then left to cool.

Occasionally, I don't necessarily think all that much of what I've made at school on a given day, but then I get whatever it is home (assuming it's something we get to bring home, which doesn't happen all that often) and have a chance to look at it in a completely different setting. And, I think to myself, "Wow--that's actually pretty cool." That's kind of how I felt about this little swan. I honestly don't know if I could ever reproduce him at home, partly because I don't have any of the needed equipment, but even if I never make anything else like this in my life, I enjoyed working on this feathery fellow.


(If you'd like to comment on this post, or to read any existing comments, please click on the purple COMMENTS below!)

Saturday, May 21, 2011

Passion Fruit Cream Cake . . .


One of the most pungently tasty items I've learned to make in the last year or two, hands down, is fruit curd. Fruit curd is a rich substance, cooked on the stove with egg yolks and butter, and can be used in much the same ways you'd use a really good jam. We make it now and then in pastry classes at school, and it's often a predictable citrus flavor--lemon, lime, or orange.


But last week, browsing through cookbooks at home, I found a recipe for a simple genoise layer cake that included a passion-fruit curd filling, with the curd being made from frozen passion fruit puree. Serendipitously, I happened to have a package of passion fruit pulp in my freezer, and it was getting antsy to be used. Frozen fruit pulp, which I've sung the praises of before, can be remarkably inexpensive. It's not to be confused with the shockingly costly, concentrated fruit purees that professional pastry chefs buy in quantity to have on hand in their enormous freezers. Those purees are of exceptional quality, no doubt about it, but they're another animal altogether. For those of us with no access to wholesale prices on those sorts of goods, we'd easily have to pay $15 to $20 for a 1-kilo container.Yeah, I know. Not bloody likely, right?


The type of fruit pulp that I'm talking about is often found in Hispanic food markets, but it can increasingly be found in mainstream grocery stores, gourmet markets, and even health food stores. Brace yourself for the price I paid for one package of this gorgeous, golden, passion fruit pulp: $2.05. That's right. Two bucks and minimal change. Unbelievable, isn't it? You've gotta get some. Granted, it's not high-brow, but it's still pretty darn good.

Besides loving the pulp itself, which comes in several flavors--some of them quite exotic to a Midwestern girl like me (eg., lulo, mamey, soursop)--I love the flat plastic bags in which this stuff is packaged. You can lay lots of these in your freezer and they'll take up almost no space at all. It's the best thing since sliced bread (or maybe I should say sliced fruit).


About this recipe . . . 

I have to tell you at the outset that my favorite thing about this recipe was the curd and, given what I just said above, that's surely not a surprise. But, the fact is, I am not a huge fan of genoise in general. In terms of flavor, it's an eggy cake--one of the classic "foam" cakes similar to a basic sponge--that certainly has its place in the pastry pantheon, but I am not sure it complements this curd in the very best way. And I have always been hypersensitive to anything that's overtly eggy tasting. 'Course, that's just me.


Were I to make this particular cake again, I think I'd use only one layer of the genoise and split it in half horizontally, rather than using two thick layers, which seemed to be overkill. I might also consider brushing the layers with a simple sugar syrup to combat any latent egginess. But you, fellow bakers, should follow your heart. Perhaps you adore genoise? Then by all means use both full layers. In any event, I can strongly endorse this recipe for the passion fruit curd alone. And, who doesn't love whipped cream? We all love whipped cream, don't we? Of course we do. So use that, too.


This dessert hails from the pleasing little book, Luscious Creamy Desserts, by Lori Longbotham. The only change I made to this formula was to add some powdered sugar to the whipping cream, and to reword the instructions, reflecting exactly what I did.

Passion Fruit Cream Cake
(For a printable version of this recipe, click here!)

Ingredients for the fruit curd:
1/2 cup butter, unsalted
yolks from 5 large eggs
1/2 cup granulated sugar
1/2 cup frozen passion fruit pulp/puree, thawed
1 pinch of salt
2 tsp. fresh lime juice

To make the curd:
 Place a fine mesh strainer over a medium-size glass bowl. Set aside.
Melt the butter in a heavy, medium-sized, saucepan over a medium-low flame. Take the pan off the heat and, whisking constantly, pour in the sugar, fruit pulp/puree, yolks, and salt. Put the pan back on the stove over medium heat. Begin by whisking frequently, and cook for about 10 minutes, stirring constantly for the last few minutes as the mixture thickens. It should seem thicker than gravy but still be easily pourable.


Take the pan off the stove and immediately pour the curd into the strainer over the bowl, encouraging it through with a spoon or flexible spatula.


Whisk in the lime juice. Cool to room temperature. Cover the bowl securely with plastic wrap placed directly on the surface of the curd, to help prevent a skin from forming as it cools. Refrigerate the curd for about 2 hours, until completely chilled.


Ingredients for the cake layers:
1 and 1/4 cups all-purpose flour
6 large eggs
3/4 cup granulated sugar
1/4 unsalted butter, melted

To make the cake:
Preheat oven to 350 degrees. Butter the bottom and sides of two 8" round cake pans. Cut a parchment paper circle to fit onto the bottom of each pan.

Sift the flour three times onto a sheet of parchment or wax paper.

Beat the eggs and sugar in the large bowl of your mixer, using the paddle attachment, for up to 10 minutes, until the volume has increased at least three times. The mixture should look thick, pale yellow, and bubbly.


Take the bowl off of the mixer. Sprinkle in half of the flour, folding it in with a hand-whisk just until combined; repeat with the rest of the flour.


Drizzle in the melted butter and whisk only until combined.


 Divide the batter equally between the prepared cake pans.

Bake the layers for 20 to 25 minutes, until the cakes begin to pull away slightly from the sides of the pan. Cool the layers for 10 minutes before removing them from the pans. Peel off the parchment circles and let the layers cool completely before assembling the cake.


For the whipped cream filling:
1 cup whipping cream, very cold
1/2 sifted confectioners' sugar

Whip the cream until soft peaks form. Sprinkle in the confectioners' sugar and whip until stiffer peaks begin to form. Keep the whipped cream cold until you're ready to spread it on the cake.

To assemble the cake:
Place one cake layer on your serving plate. Spread about a cup of the curd evenly atop that.


Spread a thick layer of the sweetened whipped cream over that.


Sandwich the other cake layer on top. Using a fine mesh sieve, sprinkle another tablespoon or two of confectioners' sugar over the filled cake.


Keep the cake refrigerated if you won't be serving it right away.


(If you'd like to comment on this post, or to read any existing comments, please click on the purple COMMENTS below!)

Saturday, May 14, 2011

The Moral of the Story: Cool Your Bundt . . . (Triple Coconut Cake with Chocolate Glaze)


I knew there'd be trouble when I read that line of the recipe instructions--the one suggesting that the cake could be turned out of the bundt pan within 2 minutes of taking it out of the oven. What? All of my past experience warned that, for me at least, doing such a thing would be delusional at best and suicidal at worst. Good sense hovered in the room like a ghostly specter in a cute apron, whispering, "Don't do it, Jane. You know it won't work. It's never worked before. Just put down the bundt pan and step away from the cooling rack."


But I ignored every molecule of my better judgment. It was crazy risky and destined to result in a mess. I tempted fate, and she slapped me back into reality. Needless to say, I decided to top this baby with a shiny chocolate glaze. Like the makeup we wear, it can't hide every imperfection, but it sure can help. 


And even though its outer beauty was marred beyond repair, it was a fine tasting cake. Moist tender crumb and rich coconut flavor, all deftly enhanced by the dark chocolate. You should try it. But bring the sense you were born with into the kitchen with you when you do. Because clearly, I forgot to bring mine!


About this recipe . . . 

Adapted from the little book, Kiss My Bundt, by Chrysta Wilson, this recipe is one I'd definitely like to use again. I altered the formula by using more coconut milk than called for and no regular milk, to enrich the batter and add more coconut flavor. I also decided to reduce the amount of vanilla extract called for, and I added in a small amount of finely shredded, sweetened coconut. Though the recipe also calls for coconut extract as well, I have never, ever seen 100% naturally flavored coconut extract for sale anywhere, so I used several drops of LorAnn brand coconut flavoring. It's a high quality substitute that does indeed impart great coconut flavor to baked goods (and it should not be confused with pure coconut oil, which will not work as a substitute for a flavoring in baked goods, as far as I am aware). I liked the dark chocolate glaze a lot. It sets up well on the cake, yet stays shiny and kind of soft. I also rewrote all of the directions to reflect exactly what I did.

Triple Coconut Cake with Dark Chocolate Glaze
(For a printable version of these recipes, click here!)

Preheat oven to 350 degrees. Prepare a 10-cup bundt pan by thoroughly greasing and flouring, making sure it's coated completely, or by spraying liberally with baking spray. (I used a light colored metal bundt pan, and I used baking spray.)

2 and 1/2 cups all-purpose flour
2 and 1/2 tsp. baking powder
1/2 tsp. salt (I used kosher salt)
3/4 cup unsalted butter, slightly softened
1 and 3/4 cups granulated sugar
3 large eggs, at room temperature
1 tsp. vanilla extract
3/4 tsp. coconut flavoring blend or "extract" (I used several drops of a concentrated coconut flavoring called LorAnn's; available in cake decorating supply stores or sometimes in craft stores like Michael's. Any good coconut flavoring should do.)
1 and 1/4 cups coconut milk (Available canned, often found in the grocery aisle with Asian food ingredients.)
2/3 cup finely shredded sweetened coconut (I pulsed it in my food processor a few times.)

In a medium size bowl, sift together the flour, baking powder, and salt. Set aside.

In the large bowl of your mixer, using the paddle attachment, beat the butter for two minutes, or until completely soft. Pour the sugar in slowly, on medium low speed, and mix again for two more minutes.

One at a time add in the eggs, beating on medium speed after each addition until well blended. When all the eggs are in, beat for two more minutes, scraping bowl and beaters as needed.

In a separate small bowl, stir together fork the coconut milk and flavorings.

On medium-low speed, starting and ending with the flour mixture, alternately add in one third of the flour, then half of the coconut milk until it's all combined. Add in the shredded coconut until combined.


Fill your prepared bundt pan no more than 3/4 full. Bang the filled pan firmly on your work surface a couple of times to close up large air pockets.


Bake the cake for at least 40 minutes. Don't open the oven door at all until quite late in the baking cycle.

Be sure to cool the cake in the pan for at least 15 minutes or far more before you even attempt to remove it. (Some bundt cake recipes will even tell you to cool the cake entirely in the pan. Use your own judgment, but be careful. Don't make the mistake I did!)


Apply the glaze only after the cake has completely cooled. It will begin to set up quickly after being poured.

Dark Chocolate Glaze

3/4 cup unsalted butter
6 oz. premium dark chocolate (I used a combo of Scharffenberger and Ghirardelli), chopped into small pieces
2 Tbsp. light corn syrup

Melt the butter in a small sauce pan over low heat.

Remove the pan from the heat and add in all of the chocolate; let it melt in the pan, stirring gently as needed.

Add in the corn syrup and stir well with a whisk, until completely combined.

Let the glaze sit for a couple of minutes before spooning or pouring it over the cake. 

Friday, May 6, 2011

Blueberry Banana Sorbet & Whimsical Tuiles . . . (How to Make Your Own Tuile Stencils)


I am psyching up to begin another pastry class next week. This one, Pastry II, goes until the very end of June. So, besides readying my psyche, there are a number of other things I need to prepare in order to launch quickly from the house come 6:30 a.m. on Monday morning. The supplies alone can require a pack mule--notebook, binder, textbook, recipe packet, apron, neckerchief, chef's coat and pants, chef hat, digital scale, digital thermometer, and the rather awkward and weighty knife-filled case that is the unmistakable identifying mark of a culinary student in transit.


Yesterday, while sorting through my papers from last semester, I happened upon the recipe for tuile dough that I used as one small part of my "practical final" exam in my Plated Desserts I class this winter. I'd always intended to make tuiles at home and blog about them, and this seemed like a good time to finally do it.


In case you're not familiar with them, a basic tuile (pronounced tweel), which means "tile" in French, is a very thin, slightly sweet, rather bland cookie made from an exquisitely short list of  ingredients--typically just butter, powdered sugar, egg whites, and flour, though additional ingredients like sliced almonds are not uncommon. A tuile's most unique characteristic is the fact that it can be shaped/curled/molded by hand while it's still very hot.


Tuiles are not really something that one can mass produce in a short period of time at home, but that's hardly a concern. They allow for so much customizing and creative interpretation, they're worth the trouble. And, best of all, they're actually a lot of fun. Do they require some planning? Kind of. If you want to make them into particular shapes, then yes, definitely, because you'll need templates. Rubber or plastic templates specifically made for tuiles can be purchased, but they're pretty costly. The templates I used are my own; I made them using thin, soft, non-toxic craft foam from Michael's craft store. I cut the designs out of the foam with an exacto knife.


The sky's the limit in terms of shapes if you're making the templates yourself. The foam sheets are very inexpensive so it's no big deal if you make a few mistakes. And, if you just want to make plain round tuiles, you won't necessarily need to use templates at all.


Tuiles make perfect serving vehicles for other dessert items. Ice cream, sherbet, sorbet, and mousse all love nestling close to tuiles. They provide the perfect crunch factor and their lack of assertive flavor works to their advantage. Case in point: What might go well with a wacky item like blueberry banana sorbet? A thick chocolate cookie? Yuck. An overwhelmingly lemony cookie? Ehh, not so much. A lovely, crunchy, sweet-but-subtle tuile? YES!


About these recipes . . . 

I adapted this sorbet from pastry chef David Lebovitz's book The Perfect Scoop, including twice as much banana as the recipe called for, along with a bit more sugar and slightly more blueberries (yeah . . . I had to get rid of  those speckled bananas languishing on the counter . . . again). It's a simple, casual treat, and it's even fat free. The flavor combo seems a little off the wall, but if it's good enough for David Lebovitz, well, enough said. You could make this and have it chilling in your freezer inside of half an hour if you're quick on your feet. It's easier than heck--no fussing required.


The tuile recipe is from Professional Baking, by Wayne Gisslen. That was the textbook used for my Pastry I class last autumn, my Retail Baking class a year ago, and even for my Plated Desserts I class that ended a couple of months ago. It's a pretty thorough volume. Another remarkably easy formula, it's practically impossible to screw up. And, you can make the dough ahead of time because it has to chill for at least an hour before you spread it.

Blueberry Banana Sorbet and Tuiles
(For a printable version of these recipes, click here!)

Yield: One quart of sorbet and at least two dozen average size tuiles

Equipment for sorbet:
-- food processor or blender

-- ice cream maker, or ice cream maker attachment for your mixer
-- 1 quart container in which to chill finished sorbet

Equipment for tuiles:
Food scale to measure tuile ingredients
1 or 2 Silpats (silicone pan liners) or parchment paper
1 or 2 very flat cookie sheets
1 small offset spatula
scissors
flexible tuile templates


Ingredients for sorbet:
2 and 1/2 cups frozen wild Maine blueberries (They're little, very blue, and sweet; I buy them in large bags from Costco. Of course, if you have good fresh berries on hand, don't hesitate!) 
4 medium size very ripe bananas
1 and 1/4 cup granulated sugar
1 cup cold water
1 Tbsp. lemon juice 


In a food processor or blender, pulse together all of the ingredients until the blueberries look almost  pulverized and the mixture looks not-quite completely smooth. 


Then process the mixture according to the instructions for your ice cream maker. (I used the ice cream maker attachment for my KitchenAid mixer, mixing on low speed for almost 20 minutes. Then, I put the sorbet into a container and froze it for several hours before serving. It doesn't freeze rock hard, and it scoops nicely.)


Ingredients for the tuiles: 
2 and 1/2 oz. (5 and 1/3 Tbsp.) of unsweetened butter (An extra high-fat brand like Plugra is often recommended for tuiles.)
3 oz. cake flour or all purpose flour, sifted (one scant cup) 
3 oz. powdered sugar, sifted (about 3/4 cup)
2 and 1/2 oz. egg whites (approximately, the whites of two or three large eggs)


In the bowl of a mixer, cream together the butter and powdered sugar; start on low speed, then increase to medium as the sugar mixes in. Add in the egg whites and flour alternately, mixing until combined. The dough should be kind of thick, sticky, and stretchy.


Scoop all of the dough into a disposable pastry bag with an un-cut tip (not critical to have a pastry bag, but helpful to do it this way!) and refrigerate it for one hour or more. 


You'll trim the tip off the pastry bag right before you use the dough. 

If you'd like to make decorative little designs in the tuiles after the dough has been spread on the templates, separate out a couple tablespoons of the dough before it's chilled and mix a teaspoon or two of cocoa powder into it. 


Put this cocoa dough into a very small pastry bag, preferably one made of parchment paper (here's a site that shows how to make one of these; it's a foundation skill for cake decorators and pastry chefs!). It will need to have a tiny opening tip that you will trim with scissors right before you're ready to use the dough.


Once the dough has chilled sufficiently and you're getting ready to bake, preheat the oven to 325. 

Take a perfectly flat cookie sheet without sides (or use the back of a cookie sheet with sides), and place your Silpat or parchment sheet over it. This process is stress free if done on a Silpat type of pan liner, just fyi. If you're using parchment, it should be cut to fit the cookie sheet without overlapping the sides. 


Place your tuile template over the Silpat/parchment. Cut the tip off of the filled pastry bag, about an inch up from the point. Squeeze a plump line of dough onto each template shape you'll be using. 


With the offset spatula, carefully spread the dough smoothly into each cut-out. You may need to hold the template sheet in place with one hand if you're doing this on parchment. 


If you want to add decorative designs in the dough with the cocoa dough, do it now. Cut the tip of the parchment cone with the cocoa dough in it and create any designs you like, just squeezing a tiny line onto the plain dough.

When all the shapes you're using have been filled, gently lift the edge of the template and peel it off. 


Bake the tuiles for approximately 6-7 minutes,just until they begin to get lightly golden. They bake quickly and burn easily; keep a close eye on them. 

Using the offset spatula, carefully lift each piece, working with just one at a time, and mold it quickly with your hands or press it over a form (like a small, upside-down drinking glass) to make it into a bowl shape. It will be quite hot so use care. If a tuile cools into a shape you didn't intend, you can put it back in the oven to soften it and try again. The tuiles will start to harden within about 15 seconds, so you don't have any time to fool around once you start doing this. Store the finished tuiles away from moisture.


(If you'd like to comment on this post, or to read any existing comments, please click the purple COMMENTS below!)